Physical Address
304 North Cardinal St.
Dorchester Center, MA 02124
Physical Address
304 North Cardinal St.
Dorchester Center, MA 02124
Amazon Finds | Amazon Products You Need
Amazon Finds | Amazon Products You Need
DIY home decor has gained immense popularity in recent years, becoming a favored approach for many individuals looking to personalize their living spaces. This trend emphasizes the creative aspect of home decoration, allowing homeowners to design their surroundings in a manner that reflects their unique personalities and lifestyles. The significance of DIY home decor lies not only in aesthetic enhancements but also in its inherent flexibility, enabling personal expression through innovative designs.
One major benefit of engaging in DIY projects is cost-effectiveness. Many traditional home decor items can be prohibitively expensive, particularly when dealing with designer brands. By opting for DIY solutions, individuals can create stunning accents without breaking the bank. Utilizing readily available materials or upcycling old furniture fosters a sense of resourcefulness, allowing homeowners to achieve professional-looking results at a fraction of the price.
Additionally, the act of creating DIY home decor can serve as a fulfilling and therapeutic experience. Each project presents an opportunity to channel one’s creativity, leading to a sense of accomplishment when the finished product is admired. Engaging with art and craft not only stimulates the mind but also fosters a deeper connection to one’s living environment. As individuals invest time and effort in their living spaces, they cultivate an emotional bond with their homes, resulting in a more enjoyable and restful atmosphere.
Furthermore, the process of designing and creating DIY accent pieces encourages experimentation, allowing homeowners to discover their tastes and preferences. Discovering effective combinations of colors, materials, and styles can lead to unique creations that reflect both current trends and timeless elegance. Through DIY home decor, persons not only transform their interiors but also embark on a rewarding journey of self-expression and creativity.
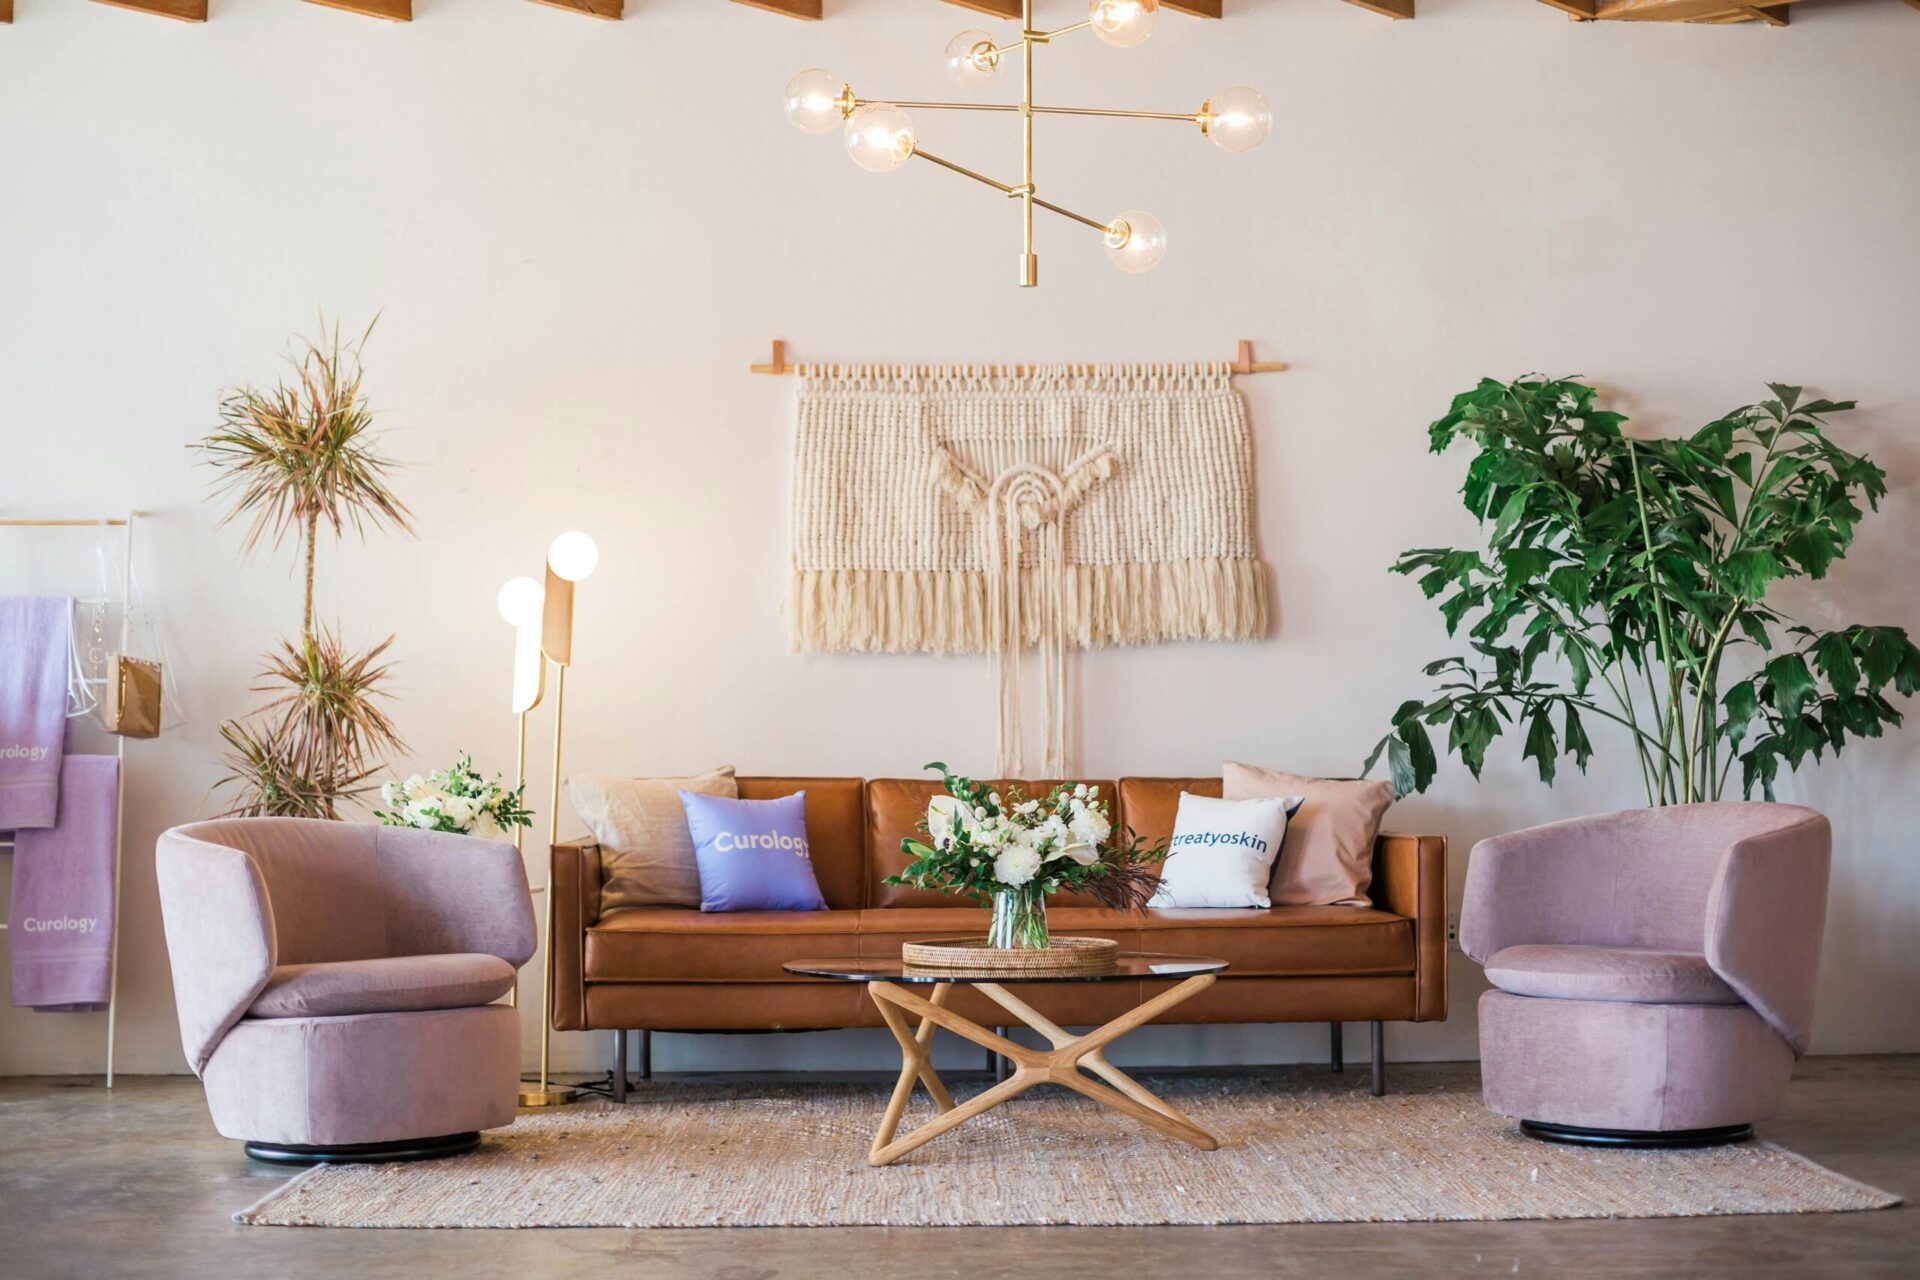
When it comes to transforming your living room, selecting the appropriate accent pieces is crucial for creating a harmonious and inviting space. The first step in this process is to consider the existing color scheme of your room. Accent pieces should either complement or contrast your primary colors effectively. For instance, if your living room features neutral tones like beige or gray, consider adding pops of color through vibrant cushions, artwork, or decorative vases. This approach not only enhances the visual appeal but also creates a cohesive environment.
In addition to color, the size of your room plays a vital role in the selection of accent pieces. For smaller living rooms, it is advisable to choose lighter, more compact items that do not overpower the space. Opting for a mirror can also help create an illusion of a larger area while adding a decorative flair. Conversely, larger living rooms can accommodate bolder choices, such as oversized wall art or large decorative baskets, which can fill empty spaces and add character without overwhelming the area.
Another important factor to consider is personal style. Accent pieces should resonate with your taste and reflect your lifestyle. For instance, if you prefer a minimalist aesthetic, think about selecting a few key pieces that are functional yet stylish, such as sleek side tables or geometric sculptures. On the other hand, if you lean towards a more eclectic style, mix and match various textures and patterns to create an engaging visual experience. Remember that selecting the right accent pieces is about enhancing your living room decor while ensuring that it feels like a true reflection of who you are.
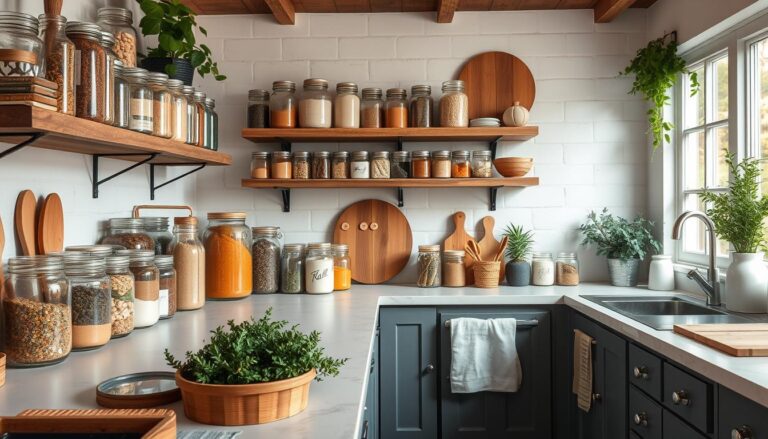
When embarking on your DIY journey to transform your living room with accent pieces, having the right materials and tools is essential for a successful project. Here, we will categorize the supplies by project type, ensuring you have a thorough reference for your needs.
For wooden accent pieces, such as shelves or small tables, you will need materials like plywood or reclaimed wood, wood glue, screws, and sandpaper. Budget-friendly wood can often be found at local hardware stores or repurposed from old furniture. In the event that wood is difficult to obtain, consider alternatives like MDF or particle board, which are more affordable and easy to work with.
Fabric-based projects, such as cushions or curtains, require specific materials like cotton fabric, stuffing or foam, and thread. For upholstery projects, consider using second-hand fabrics from thrift stores that bring a unique touch to your decor. If a particular fabric is out of reach, you might substitute it with a similar weight or texture textile to achieve the desired look.
In addition to the supplies, various tools are necessary for proper assembly and finishing. Common tools include a saw (or doweling tool), drill, measuring tape, paintbrushes, and a staple gun for fabric applications. While most of these tools can be purchased, you may consider borrowing from friends or neighbors to save costs.
Finally, it is wise to keep safety equipment on hand, such as gloves and safety goggles, to ensure a secure and hazard-free working environment during your DIY projects. With these materials and tools prepared, you will be well on your way to creating stunning accent pieces that enhance your living room’s visual appeal.

Transforming your living room can be both enjoyable and rewarding, especially when incorporating handmade accents like custom throw pillows. These decorative pieces not only introduce color and texture to your space but also provide comfort. To embark on this DIY project, the first step is fabric selection. Opt for fabrics that align with your living room’s aesthetic; cotton and linen are versatile choices, while velvet can add a luxurious touch. Consider that the fabric should also be durable, as throw pillows tend to experience daily use.
After selecting your fabric, determine your desired pillow size. A standard size is typically 16 inches by 16 inches, but feel free to experiment with different dimensions to match your furniture arrangements. Next, you will need to cut two squares or rectangles of your chosen fabric and remember to add an extra inch to each side for seam allowances.
Once your fabric pieces are ready, it’s time to sew. Begin by placing the fabric pieces right sides together, aligning the edges. Use straight pins to hold them in place before sewing along the edges with a sewing machine or by hand. Leave a gap of about 6 inches on one side to insert the pillow stuffing later. This opening allows for easy stuffing and sealing. After sewing, carefully trim the corners to reduce bulk and enhance the pillow’s shape.
Now, turn the fabric right side out and fill the pillow with your chosen stuffing, whether it be polyester fill or a more natural alternative like down feathers. After reaching your desired fullness, neatly sew the opening shut. To add a personal touch, consider embellishing your pillows with unique patterns, either by painting directly onto the fabric or using fabric appliqué techniques. These custom throw pillows will undoubtedly enhance your living room’s atmosphere and reflect your personal style.
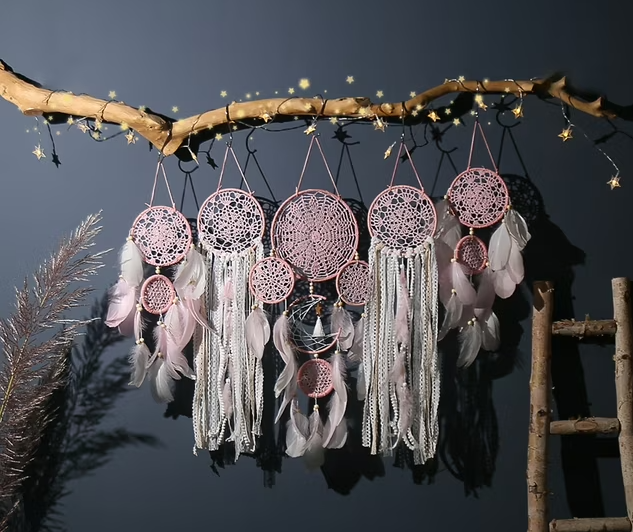
Handmade wall art serves as a captivating focal point in any living room, allowing for individual expression that store-bought decor often lacks. Utilizing various materials, such as canvas, wood, or recycled items, can open up a world of creativity and personalization. This DIY project will guide you through the process of crafting unique pieces that speak to your personal style while demonstrating how easy it is to transform your living space.
Begin by choosing a base for your wall art. A blank canvas can provide a clean slate; however, if you’re inclined towards rustic aesthetics, reclaimed wood can offer texture and depth. You can also get creative by using recycled items like old frames or even discarded materials to form imaginative designs. Assess what resonates with you, as well as what fits seamlessly into your existing decor.
Next, decide on a technique to implement. Painting is an obvious choice, allowing for a diverse range of colors and styles—from abstract patterns to landscapes. Experimenting with various brushes and tools can produce unexpected textures and finishes. Alternatively, consider collage techniques involving cut-outs from magazines or fabric scraps, which can yield captivating visual compositions. Stamping with sponges or natural materials like leaves adds further texture, expanding the dimensions of your wall art.
Once you have your piece prepared, take a moment to reflect on where it will hang. Consider how a well-placed artwork can enhance the room’s balance and overall aesthetic. Remember, handmade wall art is not just about the final product; it is also about the creative process. Each brushstroke or layer of material adds character to your living room, making it feel more inviting and personal. By indulging in this project, you are not merely decorating but weaving your narrative into your home.
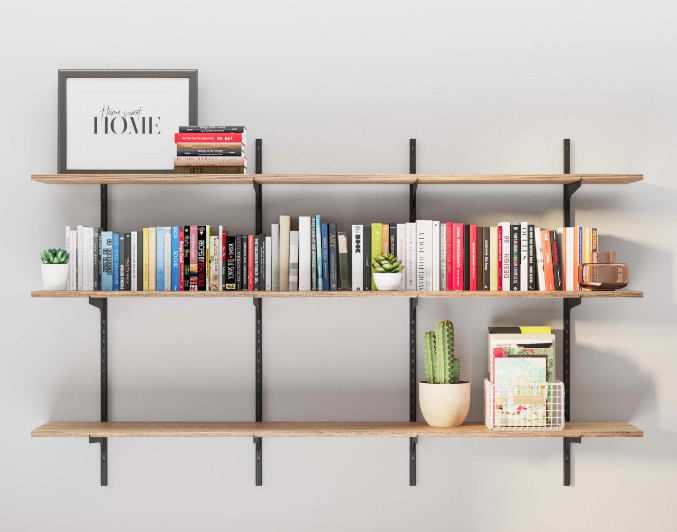
Creating stylish shelving units can significantly enhance the functionality and aesthetics of your living room. These units can serve dual purposes: providing practical storage while also acting as a decorative element. To embark on this DIY project, consider the space available and the overall design theme of your room. Repurposing old furniture, such as wooden crates or bookcases, can be a sustainable option that brings character to your shelving units.
When constructing your shelving units, it is essential to choose material that complements the existing décor of your living room. Plywood, reclaimed wood, or metal frames can be great alternatives, depending on the desired look. For a modern appeal, opt for sleek lines and minimalistic designs. Conversely, rustic or farmhouse styles can benefit from larger, sturdier shelves that showcase natural wood grains. Consider the dimensions—tall vertical shelving can save space and draw the eye upwards, while wide horizontal units can create a visual anchor.
For construction, basic tools such as a drill, saw, and level will suffice. Ensure to measure each shelf accurately and leave adequate space between the shelves to accommodate various items. If using an old piece of furniture, sand and paint it to create a fresh look. Adding brackets for support can ensure your shelving units remain sturdy, particularly when displaying heavier decorative items.
Once your shelves are complete, the real fun begins with styling them. You can incorporate a mix of books, plants, and decorative objects to create a balanced display. Group items in odd numbers for visual appeal, and don’t shy away from including personal artifacts to bring warmth and personality to your living room. By effectively combining both function and style, your DIY shelving units can transform your living space into a harmonious blend of organization and creativity.

Lighting plays a crucial role in establishing the overall ambience of a living room. By crafting your own unique lighting fixtures, you not only enhance the aesthetics of the space but also add a personal touch that reflects your individual style. This section will explore the creation of pendant lights and sconces, offering practical tutorials and valuable tips for a successful DIY experience.
To begin your DIY project, consider constructing a pendant light. Materials often include a light bulb, a socket, a pendant cord, and a decorative shade or cover. For a rustic look, opt for a wooden or metal shade that complements your existing decor. Start by securely attaching the socket to the shade and ensure it is fully insulated. Next, hang the pendant at a height that casts light effectively throughout your living room. A general guideline is to position pendant lights 28 to 36 inches above the surface they illuminate, such as a coffee table or dining area.
Wall sconces serve as another excellent option for achieving unique lighting in your living room. They can be crafted from various materials, such as reclaimed wood or repurposed items like jars or metallic frames. Install sconces on either side of a piece of art or mirror to create a balanced lighting effect. Remember to choose light bulbs that emit warm, inviting light, which is ideal for accentuating features in your living room.
When selecting the right bulbs for your fixtures, consider both brightness and color temperature. LED bulbs are energy-efficient and come in various tones, allowing you to customize the mood. Warm white (2700K) bulbs tend to create a cozy atmosphere. Moreover, the placement of your lighting fixtures should aim to eliminate harsh shadows and provide ample illumination for activities.
With these tips in mind, creating unique lighting fixtures becomes an achievable task that can transform your living room into a welcoming and stylish space. Embrace your creativity, and enjoy the process of enhancing your home with these thoughtful DIY projects.
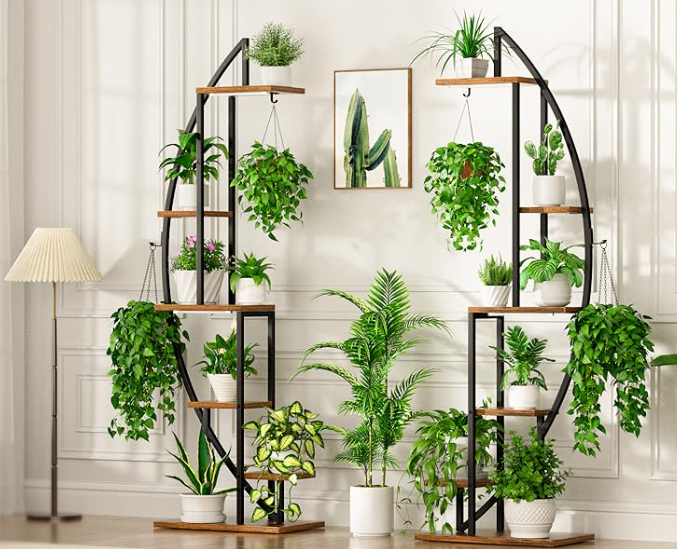
Bringing nature indoors can dramatically enhance the ambiance of your living room, and creating decorative planters is an excellent way to achieve this aesthetic. Decorative planters not only add a lush green touch to your space but also serve as functional decor. They can be created using various materials, allowing you to personalize the design to match your interior style.
To get started, consider the materials. Wooden planters offer a rustic charm, while ceramic or terracotta options bring a more traditional feel. For a modern look, metallic or concrete planters can be used, providing a sleek aesthetic. If you prefer a sustainable approach, upcycling old containers or using recyclable materials can add character and promote environmental consciousness.
When selecting plants for your decorative planters, choose species that thrive indoors. Options such as succulents, snake plants, or pothos are excellent choices due to their resilience and minimal care requirements. These plants not only enhance the overall decor but also contribute to improved air quality, making them a healthy addition to your living environment.
To create your decorative planters, begin by ensuring proper drainage. If using non-draining pots, add a layer of pebbles at the bottom to prevent overwatering. Next, fill the planter with potting soil, leaving enough space to accommodate your chosen plant. After placing the plant into the soil, ensure it’s stable and secure, then water as needed.
Lastly, consider how to display your decorative planters. Elevating them on stands, or placing them on shelves or in window sills can showcase the greenery effectively. By incorporating decorative planters into your living room, you not only beautify your space but also create a refreshing atmosphere filled with life and vitality.
Successfully arranging your newly crafted DIY accent pieces in your living room requires thoughtful consideration of design principles, particularly balance and harmony. These two elements are essential to creating a cohesive and inviting space where functionality meets aesthetic appeal.
Begin by assessing the scale and proportion of your DIY pieces in relation to your existing furniture and the overall room size. Large, statement items may require strategic placement to avoid overwhelming the space, while smaller accents can be grouped together to create visual interest. A well-proportioned room enhances the aesthetic, allowing for smoother movement and interaction within the living area.
Next, consider the principle of balance, which can be achieved through symmetrical or asymmetrical arrangements. Symmetrical layouts foster a sense of order and stability, making them ideal for traditional decor styles. Conversely, asymmetrical designs can introduce a dynamic feel, encouraging a more relaxed atmosphere that is often seen in contemporary settings. Utilize your DIY accent pieces to complement your existing decor, ensuring that they do not clash with established themes or color schemes.
Harmony, on the other hand, is all about creating unity within diverse elements. This can be achieved by maintaining a consistent color palette or choosing materials that resonate with each other. For example, if your DIY pieces are made from wood, consider incorporating natural textures throughout the room to draw on this material consistently. Incorporating accent pieces with shared colors or patterns will also further unify your decor.
Finally, focal points play a vital role in styling your living room. Consider where you want to draw attention—perhaps a particularly striking DIY piece or an artwork—and arrange your other elements in a way that leads the eye towards this focal area. By thoughtfully creating balance, harmony, and direction, you can transform your living room into a stylish and welcoming environment.
Disclaimer: This blog post contains affiliate links. If you purchase through these links, we may earn a small commission at no extra cost to you.